In this article, I am going to show you how to implement AWS Cognito Authentication in ASP.NET Core 5.0 Web application. I will create ASP.NET Core 5.0 project and show you step by step how to use it for authentication and authorization against AWS Cognito Authentication.

In this article, I am going to show you how to implement AWS Cognito Authentication in ASP.NET Core 5.0 Web application. I will create ASP.NET Core 5.0 project and show you step by step how to use it for authentication and authorization against AWS Cognito Authentication.
Before you start to follow steps given in this article, you will need an AWS Account, and Visual Studio 2019 with .NET 5.0 development environment step.
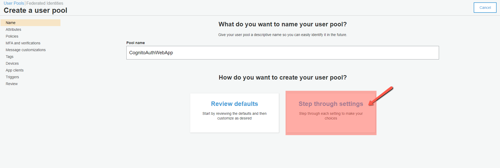
Login to your AWS account and go to Cognito. Click on Create User Pool. In the Create a user pool wizard, enter pool name and click on Step through settings.
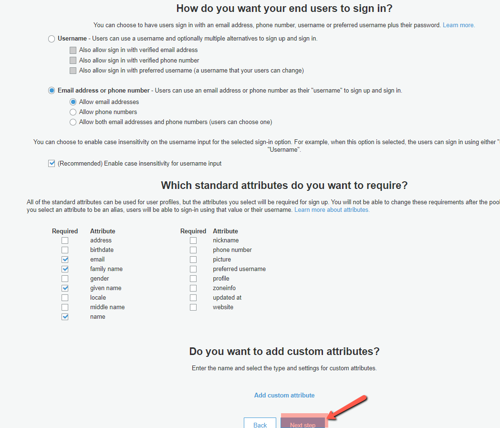
In next step, you will see “How do you want your end user to sign in?” step, where I chose Email address or phone number and in that section choose Allow email address so that users can only login through their email and there is no need to create separate username.
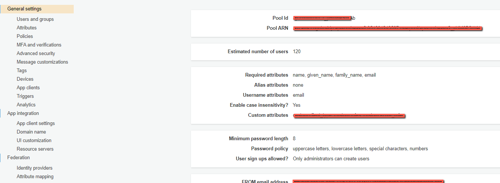
In the “Which standard attributes do you want to require” section, I chose email, family_name, given_name and name attributes as required attributes so that once user is logged in and redirected back to ASP.NET, our application read these claims to do various business operations. Click next once you are done with the selections to go to next step.
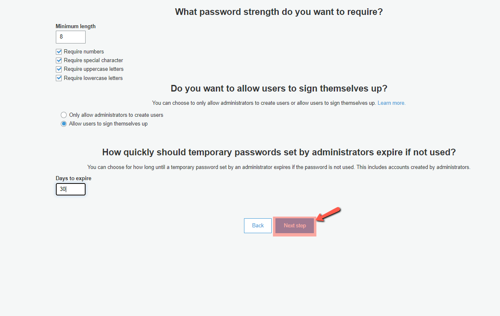
In the next step, What password strength do you want to require? and Do you want to allow users to sign themselves up?, I kept default settings as is, and in section How quickly the temporary password set by administrator expire if not used?, I change the Days to expire to 30 to make sure user has enough time to accept the invite.
Once you are done updating, click on next step.
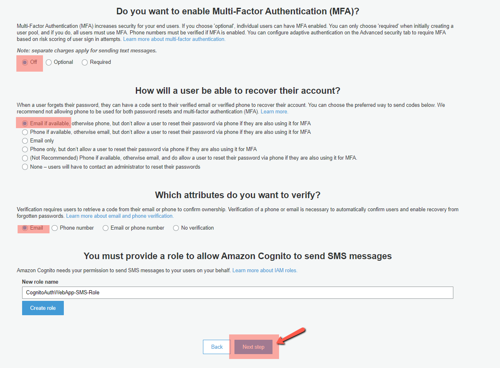
In the Multi-factor authentication step, I kept all the settings as is and click on next step
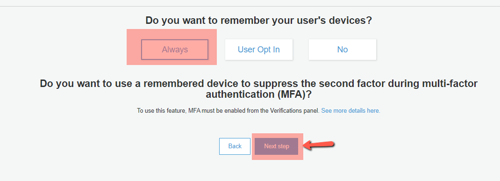
in the next step Do you want to remember your users device? I changed it to always and clicked on next step.
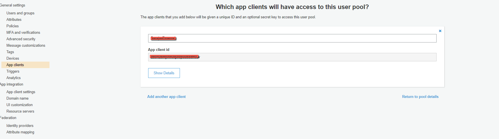
In the next step Which app client will have access to this user pool?, I clicked on add client and configured it as per the below settings and clicked on create app client button at the bottom.
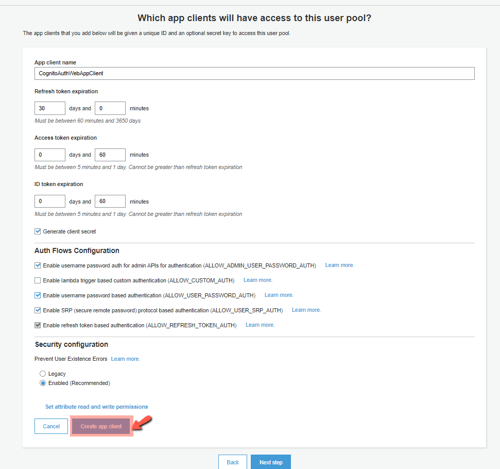
In the next step Which app client will have access to this user pool?, I clicked on add client and configured it as per the below settings and clicked on create app client button at the bottom.

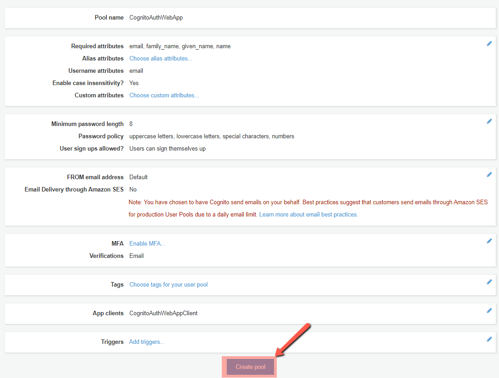
Once you click next you will see option to review the configuration of the user pool that you are creating and an option to create it at the bottom. Click on create pool.
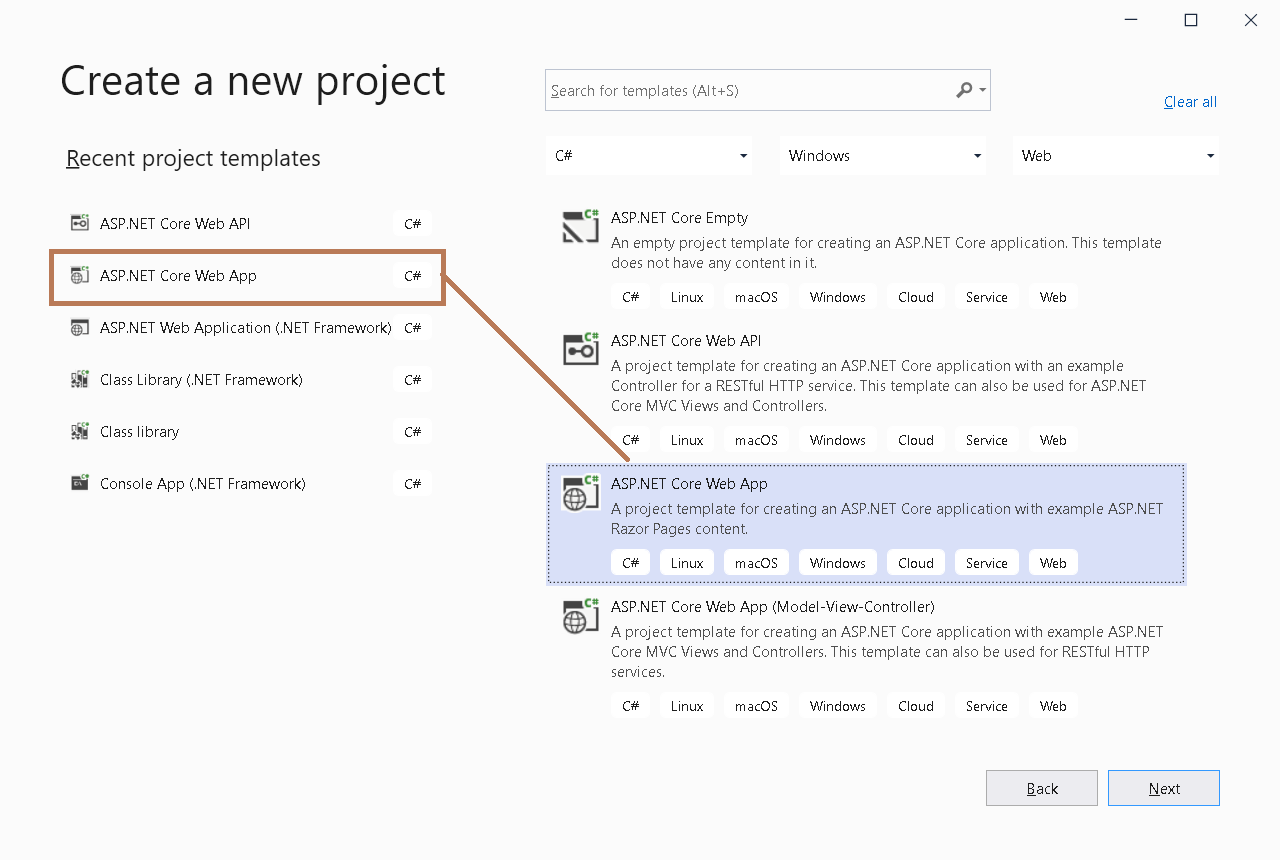
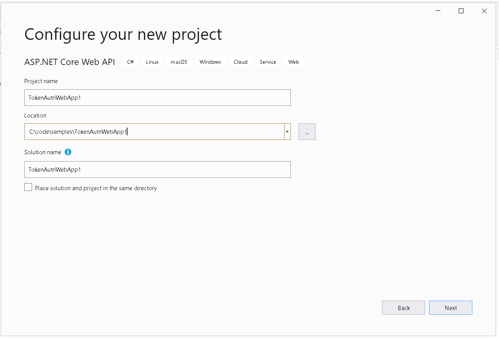
Open visual studio and click on Create a new project in the right and select “Asp.net core web app” as shown in below image and click next.
In the configure your new project section enter name and location of your project as shown in below image and click next
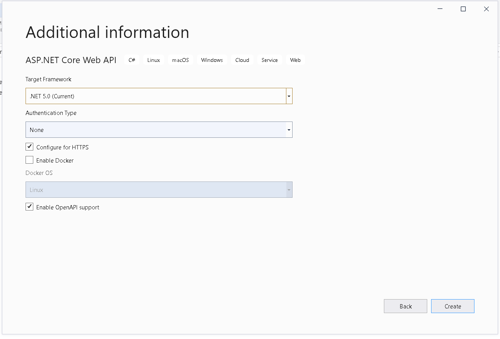
In the additional information step, select .NET 5.0 in the target framework, Authentication Type to none and check Configure HTTPS checkbox and click on create.
Once the project is created, run the project and copy the url of the project from the browser. We will need this url in the Azure AD app registration and setup.
Now, switch back to AWS Cogntio and click on general settings and copy Pool Id, we will need it in the web application configuration setting.
Then go to App Clients section and copy App client Id. We will also need it in the web app configuration
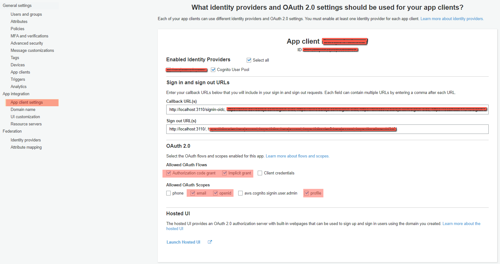
ext, click on App client settings As shown in below image, enter /signin-oidc in the call back url(s), in the sign out url(s), enter . In Oauth 2.0 configuration section, check n Implicit grant and in Allowed Oauth Scopes, select email, profile and openId checkboxes.
Finally, switch back to visual studio and open appsettings.development.json and enter add below configuration
"Authentication": {
    "Cognito": {
      "ClientId": "<app client id from AWS Cognito>",
      "IncludeErrorDetails": true,
      "MetadataAddress": "https://cognito-idp.{your-region-id}.amazonaws.com/{your-user-pool-id}/.well-known/openid-configuration",
      "RequireHttpsMetadata": false,
      "ResponseType": "code",
      "SaveToken": true,
      "TokenValidationParameters": {
        "ValidateIssuer": true
      }
    }
  }
Now, replace , your-region-id and your-user-pool-id to actual values copied from AWS Cognito user pool as per the documentation in the previous section.
Next, add package manager console and add following two package references to your web application.
Install-package Microsoft.AspNetCore.Authentication.OpenIdConnect
install-package Microsoft.Identity.Web
Next, open startup.cs in your project and paste following code in the ConfigureServices method after services.AddRazorPages(); line.
services.AddAuthentication(options =>
{
	options.DefaultAuthenticateScheme = CookieAuthenticationDefaults.AuthenticationScheme;
	options.DefaultSignInScheme = CookieAuthenticationDefaults.AuthenticationScheme;
	options.DefaultChallengeScheme = OpenIdConnectDefaults.AuthenticationScheme;
})
.AddCookie()
.AddOpenIdConnect(options =>
{
   options.ResponseType = Configuration["Authentication:Cognito:ResponseType"];
   options.MetadataAddress = Configuration["Authentication:Cognito:MetadataAddress"];
   options.ClientId = Configuration["Authentication:Cognito:ClientId"];
   options.SaveTokens = true;

});
Next, in the Startup.cs, go to Configure method and add app.UseAuthentication(); line before app.UseAuthorization(); line.
Next, open index.cshtml in the views folder and enter following lines of code
@if(User.Identity.IsAuthenticated)
{
    <p>
        @User.Identity.Name
    </p>
}
Switch to /Pages/Index.cshtml.cs and add [Authorize] attribute to the IndexModel class.
Now open Pages/Index.cshtml and add following code to the end of the file.
<div class="text-center">
    <h1 class="display-4">Welcome</h1>
    <p>Learn about <a href="https://docs.microsoft.com/aspnet/core">building Web apps with ASP.NET Core</a>.</p>

    @if (User.Identity.IsAuthenticated)
    {
        var identity = User.Identity as ClaimsIdentity; // Azure AD V2 endpoint specific
        string preferred_username = identity.Claims.FirstOrDefault(c => c.Type == "http://schemas.xmlsoap.org/ws/2005/05/identity/claims/givenname")?.Value + " " + identity.Claims.FirstOrDefault(c => c.Type == "http://schemas.xmlsoap.org/ws/2005/05/identity/claims/surname")?.Value;
        <h1>Welcome @preferred_username</h1>
    }
</div>
Save all files and run your project.
You will notice that once you run the project, the browser will redirect to AWS Cognito login page and upon return, you will see your email address on the page.
We just learned how to implement a basic AWS Cognito authentication in .NET 5.0.

Related Microsoft Blazor Articles:
Related ASP.NET MVC Articles:
IT Staff Augmentation Case Studies:
Custom Software Development Case Studies:
Web Development Case Studies:
Product Development Case Studies:
Legacy Modernization Case Studies:

Subscribe to Facile Technolab's monthly newsletter to receive updates on our latest news, offers, promotions, resources, source code, jobs and other exciting updates.

